Getting Rid of Your Junk!

Now that title is an eye-catcher, right? Who doesn’t want to clean up their life and get rid of their literal and figurative junk!? It is therapeutic to purge things. In fact, there is a whole…dare I say underground revolution…surrounding this right now. If you do a quick Google, you will find COUNTLESS books about purging–purging grief, plastic, bad habits, toxic people…THINGS. That’s where this particular post comes in 😉 Many of my friends are reading the Marie Kondo book now and going to town with the purging of THINGS (I’m a born purger so I’m admittedly not reading the book…yet!).

I’m not sure what it is, but I grew up surrounded by yard sales. Here in NY, they call them tag sales and I’ve also heard garage sale. Whatever you want to call it, I think there’s a reason my family was drawn to them–for both hosting and shopping. There’s something about putting your unwanted items out and being able to make a little cash. It makes you feel a bit like an entrepreneur, a bit like the manager of a store for the day, and a lot like you’re cleaning out–which you are! And shopping at yard sales…it’s all about the hunt for a great bargain! To this day, I get most of my kids’ clothing at yard sales. It just makes sense!

Because of my family’s obsession with garage sales over the years, I’ve learned a lot…A LOT…about hosting them. I’m going to share some tips with you today so you can have a stellar tag sale, get rid of a lot of your “junk”  and put some money in your pocket!

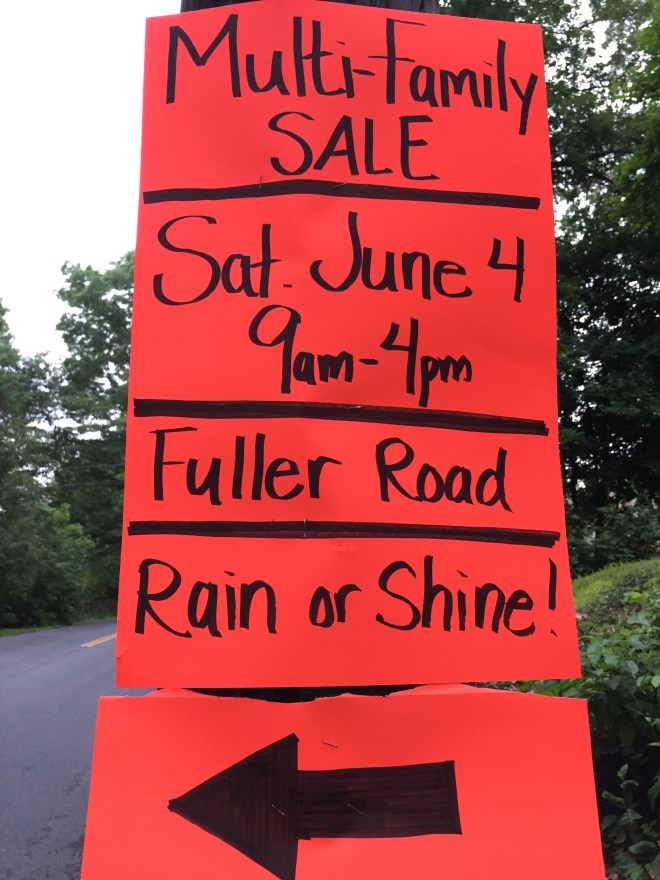
The first step is promoting your sale. If no one knows about it, you will be left with all the stuff you started with. And a sad face 😦 Some people like to purchase ads in the Pennysaver or other publications. I am here to tell you that this strategy has gone the way of the cavemen! We have had the most success with a healthy mix of good old fashioned SIGNS (yes, that’s right) and social media blasts. Get on your local Facebook community pages and use your Twitter account…advertise your sale on all the group FB pages you can find that relate to your community. Here in my area, we have a “mommy page” for every single town. I blast all of those pages with my yard sale details! And it’s not spam because mommies LOVE tag sales! The signs…the way your signs look are of utmost importance. They need to be large, neatly printed, and easy to read when driving by quickly. Plus, they must contain pertinent information: date, time, location, and rain or shine, if that’s the case for you. They also need to be placed at major intersections and on highly traveled roadways. Arrows are very important. Make the arrows separately…they should be BIG! If you make them separately, you can place them whichever direction you need to when you hang the sign 😉 Easy! Here is a picture of my signs.

IMG_4746

Next…organizing your sale. First of all…I recommend putting a price tag on every. single. item. Labor intensive? Yes. But, it will pay off HUGE when people know what to pay. If you don’t do this, you will spend 90% of your time on sale day answering the question “how much for this?” Also, when people haggle you (and they will!), you will know your starting point. If you don’t label things, you might end up giving things away for much less than you really intended and regret it later.

Next, I like to organize everything into sections so people have an easy and pleasant shopping experience. Also, it helps me out because when the sale gets crowded I can keep an eye on everything. I know where the more valuable items are and I can watch things better even when there’s a rush of people.

Round up tents (in case of rain!), tables, tarps, and clothing racks. You WILL sell more of everything if items are nicely hung and laid out and people do not have to dig through piles of things or bend to the ground for all items. If things are heaped in piles, people will miss A LOT but if things are organized, it’s easier for shoppers to see everything you have to offer! Another trick is to make tables out of saw horses and slabs of wood or old doors. We take a few doors off their hinges in order to make some really stellar tables each time we have a sale.

Also, it is good to have a variety of things. If you’ve only got clothing to sell, wait another year or two until you have more of a variety of items. Or, if you really want an epic sale, make it a multi-family sale. I have hosted four of these now and they are amazing. People flock to these sales because the variety of items is really great. If you’re doing a multi-family sale, I recommend that the head in charge of each family (usually the mom 😉 ) have her own money and her own money apron. When people buy items from multiple sellers, you do the math in your head and hand it over to your co-seller. For instance, a woman buys two items from you, one from Sheila and three from Ella. You take her entire transaction and split it up in your head (or on paper!), keep your earnings, and hand Sheila’s and Ella’s over to them. Done! Easy! It might sound like it can get complicated, but it really doesn’t. Another tip to help out with this is not to include items under $1 each. Having to make change with coins is annoying and does complicate splitting up multi-person sales. Honestly…if it’s not worth a whole dollar, throw it out or donate it!

These are my top tips. To recap:

  • Promote your sale using social media and neat, clear signage
  • Put a price on every item
  • Organize your sale into easy-to-distinguish sections (I label mine with signs!)
  • The head of each family should have her own money apron and change (include lots of $1 bills!)
  • If it’s not worth a dollar, chuck it or donate it. Don’t fuss with coins at your yard sale! 

    With that…happy yard-sale-ing! Whether you plan to host or shop…one man’s junk is another man’s treasure! ❤

The Constant Gardener

That’s what I feel like lately…like I’m constantly out in the garden. It is one of my happy places 🙂 In fact, after a long day with the kids, I like to go pull weeds or spray my homemade pesticide/insecticide, water everything, or just walk through the yard and check out how all of my “little ones” are doing. There is nothing like planting a seed and weeks later seeing it grow into a seeding and then weeks after that, harvesting your fruit and veggies that will then be brought to your table for a meal. And one of the amazing perks of spring and summer for me is constantly having a new, fresh vase of flowers on my table–fresh from our yard. I can’t take credit for that, though. The previous owners had a green thumb of their own and particularly loved flowers and decorative plants. My love is for cultivating herbs, fruits, and veggies but the existing plants that were in this yard are creating within me a love of flowers  and other plants as well.

Here’s the bunch I got last week next to the one I got this week 🙂 As you can see, my irises are out in full force this week. Last week it was mostly wild flowers.

Anyway, back to edibles 🙂 I’ve been trying to take pictures of the progress of my beds but, alas, I’m not great at that. When I’m out in the garden, I want to just “be”. Today I’m going to show you the progress so far and share with you my non-toxic, homemade pesticide/insecticide recipe. I’ll also talk a little bit about companion planting, which I rely on heavily for the success of my crops and also for pest and insect control.

Here’s my largest bed weeks ago when I was still clearing and tilling the second half of it. Last year was my first spring in this house. I was only able to clear out what you see on the left side the previous summer and I did get a few things in the ground that summer (you can see my chives and, in the box, my mint–perennials that come back each year). The photo (left) is a picture from several weeks ago when I was tilling up the existing half of the bed and the photo to the right is from two weeks ago when I finally had everything tilled and ready and I was able to get my seeds and seedlings in (you can see that in that two weeks time, my chives flowered!).

My gardens are about 70% seed and 30% seedlings. But you can do it however you’d like, of course!

First let’s talk about pests.

I like to border my beds with fragrant herbs and flowers to keep pests at bay. We have a problem around here with chipmunks and squirrels in particular. Deer can be an issue sometimes (which is why I’ve got my berry bushes fenced in), but the little rodents are more of a problem for me! I border with potted herbs and fragrant plants/flowers–lavender, rosemary, chives, marigolds, mint, dill, cilantro, parsley, and oregano are my choices. If you’ve got little kids, be careful with your oregano, as it can attract wasps. Wasps can be a beneficial inset in the garden but they can also be aggressive so just be careful!

Once I’ve got my first line of defense up, I cage in some of the more vulnerable plants. For us, it’s tomatoes, hands down. Last year when I caught a chipmunk red handed with a big, juicy, ripe tomato in his paws munching away, my then-three-year-old said “it must be Alvin because he is NOT a good listener.” Well…I could not agree more, sweet boy! ❤ This little guy and his friends are NOT good listeners! So I cage my tomatoes. And even that doesn’t always deter but it helps tremendously. Other plants that may need caged, depending on which pests you have, include carrots, leafy greens, melons and other fruits, and berry bushes should always get netting…otherwise, you’ll provide a nice meal for the birds but nothing for yourself!

Next I mix up my non-toxic, homemade pesticide/insecticide, which is made with 100% therapeutic grade essential oils. You all know by now there is only brand of oils I trust–contact me if you want to learn more about this! I use a blend of 6 oils: Peppermint, Lavender, Rosemary, Tea Tree, Black Pepper, and Thyme. Why these oils? I have researched each of these oils for their pesticide and insecticide abilities. I am not going to go into every single oil here and what it repels (each of them repel MANY things, which is why they’ve been chosen out of the hundreds of oils out there!). I can’t say that I would recommend this book for any of its other chapters, BUT chapter 18 in The Complete Book of Essential Oils & Aromatherapy is an outstanding reference for gardening with essential oils.

You’ll need a home sprayer…the number of gallons doesn’t really matter. If you have a smaller sprayer, just adjust the number of drops of oils that you’ll use. It isn’t an exact science and as you all know, I like to eyeball things. 😉 So, here’s now I make mine…

Add a little water to the spray jug. Add 10 drops of each essential oil (listed above). Then fill the remainder of the jug with water. It’s that easy! Shake it up and spray, spray, spray! The quality of oils you are spraying MATTERS. Do not just walk into CVS and buy oils and spray them all over your edibles. They must be pure oils or they will not be non-toxic. I cannot stress enough that if you need more education about what a “pure” oil is, please contact me. For legal reasons, I cannot include any brand names in this blog so please contact me with questions! All of these oils (if pure!) are safe to spray on your edibles so go to town! In fact, certain oils have been said to enhance the flavor of certain plants. You can read about this in the above referenced book. Many of these oils have anti-fungal properties so if you see any kind of mold starting on your plants, get out there and pray them! I saved my yellow squash last year in exactly that way! This spray is not just a pesticide, it’s an insecticide, too.

Need some information on those essential oils? Email me!

IMG_4868

So let’s talk about insects!

My main defense against insects is truly the homemade spray. Each oil has so many properties and can repel so many different unwanted insects that it’s really the perfect combination for any fruit, veggie, and herb garden.

In addition to my homemade insecticide, I rely on the herbs and companion planting. I highly recommend you check out Rodale’s Companion Planting guide for plant pairing when it comes to insects. This book has been my “Bible” for the garden. I rely heavily on the info between the covers to plan out my entire garden each year. Especially because I’m adding new plants each year and I like to rotate my crops to help diversify the soil (another tip you can read all about in the Rodale book). This book will help you with insect control but it will also teach you where to place your plants for optimum growth. If you have a year where something just doesn’t come to fruition for no apparent reason, you’ve probably got it next to an “enemy” plant! Certain plants actually thrive next to other plants. And certain plants will repel insects on behalf of other plants. A good blanket statement to live by is that herbs will deter pesky insets and attract beneficial ones.

For instance, plant some rosemary and mint next to your broccoli and they will keep cabbage worms at bay 🙂 Also, certain spiders, birds and yellow jackets will eat cabbage worms. So you don’t want to use a store-bought spray that will just kill any and everything in sight. You do need certain insects and birds hanging around in order to have a healthy garden. I keep a bird feeder right next to the garden. And we are very bee-friendly in this house. We never squash bees–in fact, one of the reasons I border with marigolds and other deer-resistant perennials is to attract our pollinating friends to my fruits and veggies. After all…no pollination, no fruits and veggies!

I hope this post has been helpful for you. I will be back in a few more weeks with another garden post to show you how my pesticide is working and how the crops are growing! 🙂 Until then, happy gardening!

Please comment below if you have questions about anything in this post or if you’d like to share what you’re doing in your own garden! 🙂

Memorial Day Treat

Happy Memorial Day to all! We did a short road trip (and by short I mean it’s supposed to be relatively short but with two toddlers and a 7-month-old it was very long and miserable being in the car that long) to Pennsylvania for Memorial Day weekend. But we kicked off the weekend at home, Friday, and I made a beautiful, yummy treat for the kids.

It has been SUPER hot here the last few days so it felt like the perfect time to bust out my popsicle molds and make some low-sugar, refreshing, healthy, yummy ice pops for the kids (ok…for me and the hubs, too! 😉 ). I really love making these because the kids think they are pulling one over on us by getting their way with an ice pop and I think I’m pulling one over on them by feeding them basically a frozen healthy smoothie 🙂

There are SO many ways you can make ice pops. Some people just pour juice into the molds but for me, that is far too much sugar. If you’ve been reading my blogs, you all know by now that we have been trying to reduce our sugar intake and that even one glass of juice will put your kids over their daily recommended sugar allowance (according to the WHO). So, instead of using juice, I use fresh fruit, a little bit of water, and my special ingredient–creme fraiche! SO EASY. And beautiful. And hits the spot on a 90 degree day!

Here’s my recipe and some photos to go along with it…

The first batch I made was orange/strawberry. Obviously, wash the strawberries and cut off the green tops. Then I quartered mine. I like to have chunks–albeit, small chunks–of fruit in the finished popsicle. Peel and separate your orange in slices. I recommend peeling all the membranes off the individual orange slices so you don’t have to “chew” your popsicle when it comes out. 😉 Below you’ll see my ingredients ready to go into the blender.

If you’ve been reading my blogs you’ll also know that I don’t measure but I eyeball things. So…this is how much fruit I thought I needed for about 10 ounces of liquid. I added probably about 2 tablespoons of creme fraiche and then a little water (maybe 2 ounces? You can play with it–you won’t do it wrong and you will have lots of fruit flavor unless you put waaaaay too much water in!).

After blending, this is what I had…and I poured it into the popsicle molds 🙂

I actually left mine in the freezer overnight because the kids didn’t know about them (I made them thursday and we ate them Friday) but these should freeze in a couple of hours or so.  My second batch was strawberry/blueberry/banana. The first photo is the orange/strawberry and the second photo is the strawberry/blueberry/banana.

I cannot even tell you how much of a hit both of these were. Especially the second batch–my kids LOVE bananas. You can use any type of fruit that you think will go great with the creme fraiche. Another way to do it is to use plain yogurt instead of the creme fraiche–don’t use yogurt with added sugar, though!!!! Be creative…my next batch will be peaches and cream 😉 Whatever you choose, enjoy! And a massive thank you to all the service men and women out there who have dedicated and given their lives for our freedoms ❤

30 Days of Kindness

Last Sunday in church, the sermon was about kindness. Let me sum up the story for you in a few sentences. Mephibosheth was the son of Jonathan (grandson of Saul)–a family that had long been at odds with King David. Jonathan and Saul both died in battle when Mephibosheth was a child…he had an accident and became paralyzed…he was considered a low-life and worthless because of his inability to carry on his “house” (the house of Saul). David extended kindness to Mephibosheth. Without question. Without conditions. Whew! That is a lot of detailed story condensed into an embarrassingly succinct few sentences! But now you have the very basic background story.

The story is especially important because of the extreme class differences in these two people. Mephibosheth was a “low life” and David, a king. For this man to be eating at the king’s table whenever he so pleased was a very unheard of thing. Yet that is exactly the offer that King David extended to Mephibosheth.

So…the sermon was about extending kindness to others. And the congregation was challenged…to 30 days of kindness. The specific challenge: Consciously extending kindness at least once a day to others for 30 consecutive days. Not necessarily others in a destitute state as Mephibosheth was (although that is part of it, but maybe not sustainable for a full 30 days…but maybe that is sustainable for 30 days?) but, as the pastor said, to anyone–as long as it’s a conscious effort at extending kindness. And as long as it’s for 30 consecutive days. That part is important.

This seems simple, right? But have you ever consciously done one kind thing a day, each and every day? Sure, we end up doing kind things randomly throughout our days, but consciously and with effort doing one kind thing a day? I thought this was going to be so super easy-peasy…I’m struggling, friends! This exercise has really opened my eyes to how fast we plow through our days, sometimes without looking up. It’s not that I’m being unkind or rude or anything like that. It’s just that I’m not EXTENDING kindness like I could (and should) be. Especially when I often times feel it in my heart but I don’t stop to extend that kind word or kind action.

I’m posting this to stay accountable. Here is my list so far:

Sure, some of these are small acts of kindness–and that’s ok. Others are a little larger. You don’t have to have certain resources to pull this off. Not many people can go out and buy a car for someone or pay someone else’s rent or solve deep-rooted issues in a loved ones life, etc, etc. Some people can’t even buy a cup of coffee for someone because they don’t have the extra 2 bucks. It’s ok. That’s not what this is about. There are lots of ways to show kindness. In fact, I’d love to hear your ideas in the comment section below! Maybe I will use one of your ideas! 🙂 And I’m going to check back in every so often until I’ve completed my 30 Days of Kindness. To stay accountable.

Now…you knew where this was going, right? I now challenge YOU to 30 Days of Kindness. You will take a closer look at your habits. You will have to think first and be intentional about your kindness. You will have days where you forget and then do something lame at the end of the night so you can get your act of kindness in. You will also have some really great moments and you’ll grow and open your heart just a little bit. Which is never a bad thing ❤ 🙂


Short and Sweet…

So all this talk about reducing sugar and eating super foods and having a healthy lifestyle…it doesn’t mean you can’t indulge once in a while. The key word here is balance. One thing I love to make to satisfy my family’s sweet tooth is homemade whipped cream. It is super indulgent, I can control the amount of sugar I’m adding, and it goes perfectly with all kinds of fruits and berries (and as I’m sure you know, many berries are super foods!).

I like to add real vanilla bean paste to my homemade whipped cream to make it extra decadent. I do use white, refined sugar, but just a bit. We’re used to less sugar so a little bit goes a long way. That is one thing I’ve noticed with reducing or detoxing sugar–after your body adjusts, a tiny bit of sweetness goes a LONG way. Which is great! Because you can still indulge once in a while and not go overboard doing it.

We eat dairy in this house so if you are vegan, you’ll have to skip this one (sorry!). Maybe one day I will try one of these recipes for vegan whipped coconut cream, but for today I’m sharing my dairy whipped cream!

About those berries…ever hear of the ORAC (Oxygen Radical Absorbance Capacity) scale? It’s a lab test that quantifies the capacity of antioxidants in a food. Why should you care? Because the better a food protects its “good stuff”, the more of that said “good stuff” your body will be able to absorb! Learn more here. I added blueberries (ORAC: 4,669), black berries (ORAC: 19,220), strawberries, and the next night, peaches to our whipped cream 🙂 What will you add? Pomegranate seeds, red raspberries, goji berries (ORAC: 3,290), oranges, bananas, some cinnamon (ORAC: 131,420) on top, some nuts for a little added protein? Endless possibilities, people! Which is why you can make this one a regular in your menu plans and just rotate the toppings 🙂 Kiddos love it! Want to know all the ORAC values of the above listed toppings? You can find that info here. Without further ado…

Homemade Whipped Cream

1 Pint Heavy Whipping Cream

Vanilla Bean Paste (one bean)

1-2 Tablespoons white sugar to taste

Berries, peaches, other fruits, nuts, coffee, black tea, whatever else you’d like to eat this with! 🙂

This makes a lot of whipped cream so you might want to half it if your family is less than four people 😉

You’ll need a whisk head like this for your mixer:

IMG_4632

If you’ve never worked with vanilla beans, you will want to cut the bean in half, then you slice the bean down the middle. Open it up so you can see the paste in the middle. And then scrape the paste out of the bean. You will add this directly to the bowl just like this. So, leave it on your knife and set it aside.

Ok…now…

Add the whipping cream, vanilla bean paste, and sugar to your mixing bowl. Mix on high (with your whisk head) until the cream starts to look fluffy and forms peaks. Scrape the sides of the bowl and put the cream in the fridge to set (about 20 minutes or so). Add your other goodies and enjoy! Keep the whipped cream in the fridge. For best storage, I like to keep it right in my stainless steel mixing bowl so it stays nice and evenly chilled!

Frankincense

download-9

Can we just talk about frankincense for a minute? This ancient, sacred tree has been healing for centuries and we are just now beginning to see its potential in our modern times. Frankincense is specifically mentioned in the Bible 17 times and incense (which likely refers to Frankincense) is mentioned 113 times. And most of us know that one of the gifts brought to the baby Jesus was frankincense. In biblical times, frankincense was more precious and valuable than gold, believe it or not. I’d just like to add that many other oils are mentioned in the Bible as well…so when you add up every reference to essential oils, the Bible mentions essential oils and healing plants over 600 times! Obviously the use of plants and their oils was a common, every day practice.

Today we turn to man-made synthetic pharmaceuticals when we are ill. Why do we do that? Well, opinions vary but mine has to do with the giant cash cow that the pharmaceutical industry has become. But, once again, that is for another post! 😉 Did you know that essential oils were the main medicine before man-made drugs? And many man-made drugs are intended to imitate things in nature. Aspirin and other painkillers? They imitate wintergreen, for instance. And morphine was first derived from poppies. Once it was synthetically produced, it was chemically concocted in many forms.

As a person who has been seeking out holistic remedies for years and who, over the last year and a half, has discovered the amazing power of essential oils, I’m relieved to see the scientific community finally turning to some of these oils for answers. Frankincense, or Boswellia as its known in the scientific community (that’s the botanical name), is being tested for its mind-blowing affects on cancer cells and other ailments. I highly encourage you to visit www.pubmed.gov and search for Boswellia so you can read about the clinical trials that are going on with this oil and its eradication of cancer cells (heavily being tested on breast cancer cells at the moment…for anyone interested).

This is the tip of the iceberg as far as I am concerned. My hope is that soon the scientific and medical communities will turn to ALL of the essential oils for answers to unsolved problems.

So, frankincense. Here are some awesome facts…there are four species of Boswellia that produce what we know as frankincense resin and/or oil. The resin from the trees is available in different grades and the quality depends highly on time of harvest, soil, climate, and age of the tree. There is only one company I trust for its purity when it comes to essential oils. For legal purposes, I cannot list that company here, but if you want more information about how to get the purest essential oils, please email me. Much like maple syrup, the Boswellia tree is tapped by cutting the bark and the resin bleeds out and hardens. Resin is collected and literally hand-sorted for quality.

The frankincense tree is famous for being able to grow in extremely unforgiving circumstances–like out of solid rock! Don’t believe me? Check this out:

download-8


Pretty amazing, right? Most frankincense is harvested in Somalia. There are many, many uses for this oil. I encourage you to check out wikipedia and some other online resources to really delve into the health benefits associated with frankincense essential oil. I like to wear and diffuse the oil for a calming effect and my favorite thing to do is burn the resin when I’m praying, meditating, or doing yoga or anytime I just need to heighten my spiritual senses and reconnect.

You can also find frankincense burners–these are abundantly available–and high quality resin is available from the company where I like to purchase oils.


Here is my burner. You simply put the resin in the top…

IMG_4438

…add the lid and turn on the burner. Within minutes you are transported to the ancient lands of Arabia. Perfect for praying, meditating, reading, yoga…whatever works for you.

If you have any questions for me about essential oils in general, click the contact tab on the blog homepage and send me an email. I love to talk about oils!

Frankincense–and other plants–just may hold the answers to many unresolved medical issues. I intend to keep my finger on the pulse of these clinical trials and will be blogging about results and applications so stay tuned for much more on this as the posts unfold! As for now…however it is that you reconnect, it is my hope that this post brings you inspiration to go meditate, pray, read, exercise, or whatever it is that you do to find a spiritual connection. Peace be unto you, and have a blessed day! 🙂

Don’t worry, be hempy :)

Ok…so I can’t take credit for the title. It’s actually the name of the hemp butter I used to make the above sandwich.

That’s right, hemp butter. Who knew!? The Peanut Principle is an awesome peanut butter company that has REALLY revolutionized the concept of nut and seed butters. We are lucky enough to have these guys at our local farmer’s market and we stop at their stand often. It seems like they are always coming up with new ideas and they have so many products! Last weekend at the market, I stumbled upon their hemp butter, Don’t Worry, Be Hempy.

Eyebrows were raised. Labels were read. It was a very timely stumbling (have I mentioned yet that I don’t believe in coincidence?) because I had just been reading about the history and the amazing health benefits of hemp. Of course I picked up a jar 😉

So let’s talk about hemp. You probably conjure up all kinds of images when you hear that word. Hippie jewelry, perhaps? Hippie shampoo? Hippie clothes? Maybe even “weed”? Um…hippies in general?? First things first…is hemp cannabis? Yes. Is hemp marijuana? No. They are both varieties of cannabis but are chemically and structurally different. Hemp is used for its fiber and the other variety for its narcotic effects. THC–the chemical in marijuana that makes people high–is found in trace amounts in hemp. Obviously, it’s found in higher amounts in weed (10%-27%, typically).

I was watching a documentary (I’m a documentary junkie!) about cannabis and learned a lot about the history of hemp and weed. Unfortunately, I can’t think of the name of it and when I did a search to try to find it, so many came up that I have no idea which one it was. But here is what I was surprised to learn: Did you know growing hemp (not marijuana–hemp) is illegal in the US? Like right now? And has been for decades? When the early settlers arrived in the US, hemp was used to make everything from wagon covers, canvases, clothes, rope, jewelry, baskets…you name it. In fact, early on in the Jamestown settlement, land owners were required to grow hemp for export to England. According to this site, hemp was even considered currency…like people paid their taxes with it. What?! In today’s world, hemp is still an amazingly profitable crop…but not for US farmers 😦 Anyone in the US using hemp to make products is importing it from other countries. Ridiculous? Yes, very much so. You can find some great facts about the history of hemp and the movement to legalize it for farmers here in the US on this site.

Ok. Back to the point of this particular post…hemp is also a super food! Well, the seeds are a super food 🙂 And the rest of the plant is pretty amazing as well, as we’ve learned. Even the “recreational” variety of cannabis is pretty darn amazing. Curing cancer? Treating asthma? Stopping epilepsy? Yes. All of the above. But that is for another blog post! Back to our super food of the hour…

Hemp seeds have a perfect balance of omega 3 to omega 6 fats. They also contain protein, iron, vitamin E, fiber, magnesium, and all but one of the essential amino acids. In our house, we eat hemp butter and hemp powder. You can also get hemp oil, hemp seeds, hemp cakes, hemp protein…I’m sure the list is growing as we speak! I enjoyed referencing this article for a lot of the nutritional information listed in my post. At any rate, the sandwich was yummy–and pretty! 🙂

So what are you waiting for?? Go get your hemp on!

IMG_4392

PBHB Sandwich (Peanut Butter, Hemp and Banana)

Peanut Butter

Hemp Butter

Bananas

Healthy bread of choice

It’s not rocket science…slap those babies together and make a sandwich! 😉

You can find some additional interesting facts about hemp here.

Oola-la

I had a very Oola day today 🙂 And what exactly do I mean by that? Everything was just in harmony and it all felt good. Thanks to Doctor Dave and Doctor Troy, I’ve been bringing Oola into our household. We’re trying to find that sweet spot where life is just good. All the time. Sounds nice, right?

IMG_3063

Oola is “finding balance in an unbalanced world.” So there are 7 F’s of Oola: Family, Field, Finance, Fitness, Friends, Faith and Fun. The Oola guys, as Dave and Troy are lovingly known, are trying to “change the world with a word” (love their slogan!). They give you a game plan, complete with a goal map, so that you can step–or leap or sprint–toward your Oola life. This isn’t a new concept, obviously. But the way the Oola guys propose personal growth is easy to grasp, it’s fun, and most importantly, it’s coming from a place of love and humility. Which is perhaps why these two are able to spread Oola full time–people are just drawn to them and their stories. Their own personal battles and successes with Oola are what qualifies these two to be speaking about this concept.

Their awesome book (which is a totally quick and easy read–so pick it up even if you’re a non-reader!) talks about the Oola accelerators and the Oola blockers. Once you take a good hard look and can identify what’s blocking you from getting your Oola life, you can take the steps necessary to get those blockers out of your way. You may need to lose weight, you might want to become debt-free, you may need to work on your marriage, be a better parent, get the courage to start your business, stop sitting on the couch at night and get a social life, take a class…anything. Whatever your goals are for your life, you only get one chance. Dream big. And don’t let other people, things, or events take your dreams away from you.

When I was about 20 or so, I had an epiphany about other people and their effects on my life. It caused me to create this mantra for my life, which goes like this: “You can’t control what other people do or say. You can only control what you do and say.” That seems like a simple, obvious statement, right? But I can’t tell you how many times this mantra of mine has gotten me through some situations that were very difficult to process. And now that I’m “all grown up” with children, a home, and a complicated life to manage and care for (which involves all five little duckies 🙂 ), it’s amazing how much this mantra has really sunk in and is changing the way I’m able to care for myself and my children. And it’s totally Oola! If someone is just not in line with your Oola life, they’ve got to go. It can be tricky, for sure. But you have one life. And time is your hottest commodity. Once it’s spent, you cannot get it back. And you can’t create more of it. It’s a finite resource. So do you want to spend your precious moments on people, things, jobs, events, places, and actions that don’t contribute to your full potential? I sure don’t!

I HIGHLY recommend that you click here to check out the Oola mission, Dr. Troy’s and Dr. Dave’s stories, and their calendar of events. Dr. Dave and Dr. Troy travel around the country spreading Oola so maybe you’ll catch them when they stop near your home town. I am so, so very excited that I will have the chance to hear them speak and meet them next month when I’m in Utah for the Young Living convention.

To steal their sign off, “Be grateful, have faith, and go get your Oola life.”

IMG_3116


On Pins and Needles (Exploring Chinese Medicine)

Of late we’ve had lots of reasons to turn to alternative healing. I’ve always been a huge fan of acupuncture–it helped significantly reduce my chronic migraines more than 10 years ago–so it felt almost like a homecoming to be turning to it now for my latest ailment. And by latest I mean something I’ve been dealing with for about a year and a half now.

What I didn’t remember about those acupuncture visits a decade ago was the fact that the practitioner also had me on Chinese herbs. They were capsules, so pretty easy to take. This time around, I’m on an herbal tea concoction. Now…I use the term “tea” VERY loosely here. Because it’s more like an herbal MUD. Which, consequently, is roughly what it tastes like. This mama is having trouble getting these babies down! One pouch a day. Here’s what my delicious cocktail looks like:

IMG_4419
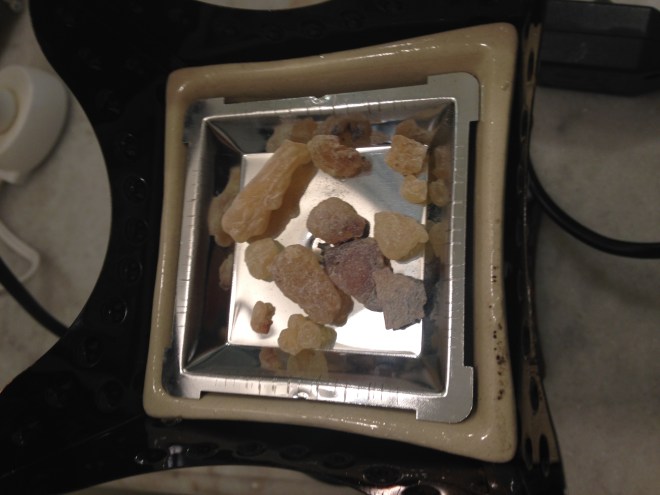
Aren’t you salivating just looking at this?! I know you want to try some…

But the whole idea of turning to Chinese herbs is very comforting to me. There is something about the deep-rooted tradition of this approach that is appealing. Around the same time I started the acupuncture, I also started taking my son (the 30-weeker preemie) to a craniosacral therapist who also suggested Chinese herbs for the littles. Coincidence? I think not. So now we turn to these when the kiddos come down with a fever or a sniffle.

IMG_4418Now a few things should be said here…do not EVER buy herbs from anyone who is not board certified. That is first and foremost. Also, there is an “art” to taking these things. So listen to your practitioner and follow her/his instructions very closely.

I will say this…my four-year-old is the worst patient EVER in the history of sick people (well…maybe besides my husband 😉 ). He just whines and is clingy and can’t get comfortable and has a poor attitude if even a sniffle comes along. The first time we turned to the herbs for a virus he had (fever and cold-like symptoms), he was like a different child! He was totally happy and calm and low-key (like his normal behavior) even when the fever hovered around 103. I was a believer from that point on! His virus was short-lived, thanks to the herbs and our essential oils, and we avoided a trip to the pediatrician.

Don’t get me wrong…we do lots of other things in this house to build immunity, ward off germs, and shorten the lives of illnesses (i.e. our essential oils, incessant hand washing, and changing our clothes when we get home from school just to name a few of the biggies). I’ve enjoyed bringing these Chinese herbs into my home as an extra line of defense. I will always choose plants over chemicals whenever possible. But there will be many more posts on that!

Now for some fun facts about Chinese Medicine 🙂

I’m currently reading “The Web that Has No Weaver” (Kaptchuk) and it is a phenomenal read so far. It was recommended to me by my practitioner, as it was actually a text they used in her master’s program. Some of the below information comes from this text.

Perhaps two of the preliminary concepts for you to consider before trying to understand Chinese medicine are Yin and Yang and Qi (“chee”). We’ve all heard of Yin and Yang (and if you are a child of the early 90’s, you wore those extremely trendy Yin/Yang necklaces that hung low over your bodysuit and you layered that with your flannel shirt), but there’s much more spirituality to the concept than good vs. evil. The basic concept in TCM is that instead of viewing these things as opposing forces, they are viewed as complimentary and interdependent forces where the whole is greater than the parts. So TCM strives to balance the Yin and Yang of the body. Qi translates as “gas” or “air” and is known as the “life force” of the body. TCM believes that Qi runs along meridians in the body. It is the same concept as “prana” in the Hindu culture or “mana” in the Hawaiian culture.

In Chinese medicine, a “diagnosis” is reached through examining what’s happening in the body as a whole and what is causing the issue–not by looking at what a bunch of symptoms tells you. For instance, 6 people diagnosed with fibromyalgia by Western means may have 6 different diagnoses in Chinese medicine. Kaptchuk says that a practitioner will look for “disharmony in the body”. Two ways your TCM (Traditional Chinese Medicine) practitioner will evaluate your whole body health at each visit is by feeling your pulse with three fingers and checking your tongue with a quick visual. Why is this done?

TCM uses the tongue as a “map” of what’s happening in the rest of the body. I found a fairly  detailed online resource that matches much of what Kaptchuk says so you can peruse while you wait for your copy of his book to arrive 😉 As for the pulse, I turn to Unschuld because I feel his description is concise and easy to understand:

“One method was based on the notion that at the high point of the styloid process below (medial to) the wrist there was an imaginary line, called the “pass,” as a narrow passage through mountains. When a finger feels the pulse with light pressure above the “pass,” i.e., toward the wrist, the pulse offers evidence about the state of the lung and heart. The connection lies in the fact that the imaginary line, the “pass,” corresponds to the diaphragm in the human body. The lung and heart are located above this separation, in the yang area of the body. The lung and heart therefore manifest in pulse above the “pass” in the yang region. Below the pass, in the yin region, the pulse reflects the condition of the liver and kidney, organs which lie below the diaphragm in the yin region of the body. Right on the pass, the middle of the three fingers feels the state of the spleen, the organ that lies closest to the diaphragm.”

Pretty interesting stuff! Before this turns into a full-fledged research paper, I will close 🙂 If you’ve been suffering with an ailment long-term and Western medicine has failed you, I highly recommend opening your heart and your mind to TCM. And soon I will post about my beloved essential oils and good ‘ol nutrition, which I also highly recommend as alternatives to Western medicine. You have many, many choices to take control of your own health!

For anyone local to Westchester County, NY looking for an acupuncturist, I highly, highly recommend Andrea at Scarsdale Acupuncture. If you call to book with her, please mention that I sent you over 🙂 (I don’t get any perks for this, I just want her to feel the love.) ❤


How Does Your Garden Grow?

It’s raining like crazy here. Not good for a Mama cooped up inside with three littles ones, but great for the garden!

I am blessed to have a beautiful yard in which to grow some yummy fruits, veggies, and herbs for my family. But it wasn’t always that way. Before this home, we were in a small town home with ZERO yard. But I did a deck garden. I started with a couple of pots of tomatoes my first year. Then I added some chives and other herbs. The next year I tried adding peppers and beans…and now each year I delve deeper into foraging the wild stuff, companion planting, natural pest control, composting, and many other aspects of my green thumb habit 😉 So much to post about, so little time!!

Making the decision to start a veggie garden is a big one. It’s extremely overwhelming and most people don’t know where to begin, so they just don’t. Which makes my sad face come out. Have no fear–I am here to help! Please, please do not forego a veggie garden because of intimidation. You may think I’m being dramatic, but being out in your garden just might change your way of thinking and your way of life. Yes, it’s that amazing.

Here are my tips:

1.) Have a plan. This is the biggest and most complicated step. But you will be glad you did this, trust me. A lot of people just wing it and things don’t grow or they end up wishing they had planted different items or the plants get out of control or they are overtaken by pests….you need to have a plan.

Your plan should take into account which plants grow well (or poorly) next to one another. Look up companion planting to learn about this. You should also think about how much space you have vs. how much space your plants will take up once mature. A deck garden with pots…not the best space for squash, zucchini, melons and the like. A good garden plan also maps out a planting schedule. Some items need to be planted earlier in the season and some later. Some veggies (like broccoli, spinach, lettuce, and many others) actually can yield two crops each year–a mid-summer crop and an early fall crop. Others still (asparagus, for one) are perennials and will come back each year so those plants need a permanent space in the garden. So read your seed packets. Finally–and this may seem obvious, but it needs to be said–think about what you actually want to eat! Don’t grow 5 tomato plants because they work well in pots and you only have a terrace garden, if you don’t eat tomatoes!!!

There are lots of options out there. Figure out what you’ll eat and want to grow, how it can fit in your space, where things should be placed, and when to plant. You can Google most if not all of this information or you can pick up some books at your local library. I’ll leave a list of some of my favorite resources at the bottom of this post. Here is a photo of my garden plan for this year for inspiration–feel free to use all or part of it!

IMG_3978

2.) Do some research and think about pest control. I personally don’t do chemicals. I use the plants themselves to control pests (again, check out companion planting), barriers, and my own homemade essential oil pesticide. Which works like a charm, might I add. I’ll be posting more about this as the season goes on and I can show you some pictures of my thriving, pest-free garden! 🙂 But for now, below are the oils I use in my non-toxic pesticide. Are you sitting there scratching your head going…Essential oils?? What is she talking about?? Then you need to click here. Want to get these oils so you can make this pesticide for yourself? Then you need to click here! 🙂 Do some research if you plan to use fences or barriers. Some little critters are very tricky! For instance, rabbits will dig right under your barriers (deter by angling 90 degrees at the bottom and burrying a few inches deep) and deer can be very swift! They will jump over a fence unless it is roughly 6 feet high. A quick Google can help you with all of this.

3.) Check your calendar and get a garden-sitter when needed. Seriously. The first year I didn’t do this or even think about it and I went on vacation for a week in July…guess what I came home to? Bingo! A shriveled up garden 😦

4.) Water, water, water! Don’t forget to water your garden DAILY. It really does need daily watering (unless it rains of course!). If you slip up and skip a day, don’t beat yourself up, but watering your garden daily is a must. The best time to water is early morning or late afternoon. Best not to water during mid-day heat if at all possible and be careful not to water too close to dusk, as certain plants are susceptible to mold and mildew if the leaves do not have time to dry off before the cool of night.

5.) JUST GO FOR IT. When you are out in the garden with your hands in the dirt, when you are caring for those plants like pets, when you are teaching your children about where their food comes from, when you are picking beans and putting them into your basket or eating a blueberry right off the bush at harvest time…You will be glad you did.

Resources I like for gardening: 

Rodale’s Successful Organic Gardening: Companion Planting – September, 1994 by Susan McClure (Author), Sally Roth (Author)