Summer Salads…yum!

Oh boy do I LOVE salads! There is truly endless possibility here but I want to talk about “summer salads” which, in my mind, tend to be a little lighter and include some more exotic items and toppings. My mouth is watering just thinking about this post!! 🙂

One of my favorite things to add to summer salads is fruit! Certain fruits pair better with certain greens and dressings. You also really can’t go wrong pairing nuts and seeds with summer salads, either. I’m going to list for you some of my favorite ingredients by categories so you can reference this post to mix and match as your taste buds guide you! I’m also going to share with you some of my favorite combinations 🙂

Greens

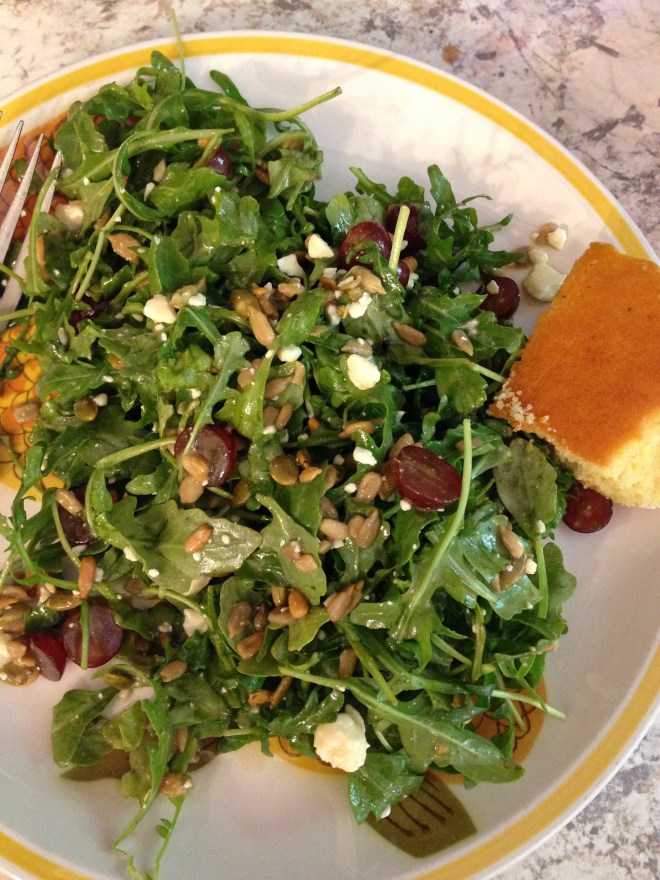
Arugula is my personal go-to green. I LOVE arugula. It happens to be one of my favorite foods of all time…I know, I’m weird. 😉 Other bases can include spinach, baby mixed greens, iceburg lettuce, romaine, kale, mesclun, butter lettuce (also love this one!), red leaf, and redicchio.

Fruits

For summer salads, you can’t go wrong adding fruit! In fact, don’t forget the almighty but often overlooked fruit salad. Every now and then, you just need a cool, refreshing plate of fruit! Pears, strawberries, peaches, blueberries, and grapes are some of my favorites to add to salads with greens. As far as dried fruit, I also love adding raisins, dried cherries, coconut, cranberries, or dried cherries.

Seeds and Nuts

Sunflower seeds, pepitas, cashews, almonds, hazelnuts, and pecans are my favorites but obviously there is a host of other options in this category. Others I can think of off the top of my head are flax seeds, chia seeds, hemp seeds, walnuts, peanuts, and pistachios.

Cheeses

Ahhh….cheese. One of my main food groups 😉 If you are vegan, leave this one out. My favorites are cheddar, feta, provolone, smoked gouda, goat cheese, parmesan, romano, robusto, and fresh mozzarella. Of course the list of cheeses is endless so I’ll let you be adventurous and Google the heck out of this category for some new ideas!

Veggies

Avocado is great for summer salads. Same for tomatoes, cucumbers, peppers, onions, and pretty much anything else that is growing in your garden right now! I do love going out to the garden and just freshly picking whatever is there but if you aren’t growing a garden (you should try it!), then just pick up whatever veggies look yummy at the store. Carrots, radishes, mushrooms, and sweet peas are a few more favorites of mine!

Herbs

I L-O-V-E putting fresh herbs in my salads. I’m not sure if other people do this regularly, but everyone should! 😉 My favorites are chives, dill, parsley and basil but I also add cilantro, oregano, or mint when it’s called for!

Other toppings

Well you all know I’m into sprouts right now. Did you know there are LOTS of different sprouts? Broccoli and alfalfa are my favorite but there’s also sunflower, radish, chickpea, mung bean (and various other beans), lentil, buckwheat, and the list goes on and on. And of course nothing beats a little fresh ground black pepper on top of the salad 🙂 Yum!

IMG_4801

Dressings

I can’t even get into all the dressings out there. But I’m into low-sugar dressings for sure. And my favorite thing to do is make my own dressing. Usually with olive oil and balsamic but I’ve also looked up recipes for whatever mood I’m in when I’m ready for my salad 😉

Delicious! And here are a few of my favorite combinations (so far!).

Mix #1: Arugula, blueberries, gouda cheese, sunflower seeds, tomatoes, broccoli sprouts, dill, chives, parsley, and black pepper.

Mix #2: Mixed greens, pepitas, avocado, tomato, fresh mozzarella, onions, yellow bell peppers, fresh basil, black pepper.

Mix #3: Spinach, strawberries, cashews, feta cheese, fresh mint, black pepper.

I have so many others! But these will be a good starting point for you if you don’t have time to mix and match right off the bat because these are three very different “styles” of salads

. Just be creative and experiment. If it sounds like it’s going to be delicious…it probably will be 🙂
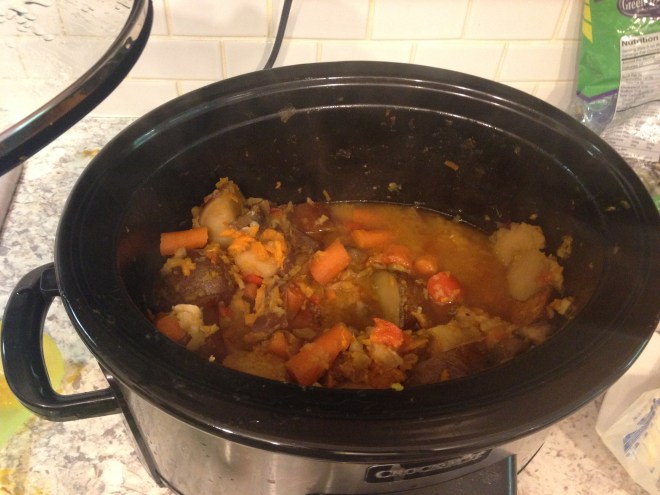
Meatless Mondays

I’ve been doing meatless Mondays for quite some time now. Did you know many people claim that going meatless just once a week (for the whole day–not one meal!) can reduce your risk of heart disease, cancer, diabetes and obesity? It will also help you do your part to heal our desperately depleting planet…you can save massive amounts of water, reduce greenhouse gasses, and reduce fuel dependence just by skipping meat one day a week. Sounds like a win-win to me! Plus, you get to be creative in your kitchen and discover new dishes you’ve probably never made before. If you want to learn more about the benefits of meatless Monday, check out this site  😉

At first “Meatless Monday” was a challenge but now I have some really reliable dinner staples that I rotate (veggie tacos, spinach quiche, roasted root veggies, pasta or ravioli, and mac and cheese with various added veggies are my go-to’s). Then there are the nights where I just kinda of play around with the ingredients I have in the house and every now and then a masterpiece is born. Which is exactly what happened this past Monday.

I had gotten some red lentils at Whole Foods. I’ve never worked with red lentils before, but I’ve used brown lentils and green lentils and my kids love them. I decided to follow the instructions on the Whole Foods label to be sure I prepared them correctly. So, I rinsed the lentils, put the water on, let it come to a boil, added the lentils and set the timer for 40 minutes.

I went to chopping my root veggies, because my goal was to make root veggies in the crock pot and serve them with the lentils. Pretty simple and basic.

Wellllll…..after 20 minutes when I got my veggies and herbs and spices in the crock pot, I opened the lid to the lentils and to my complete surprise (remember, I still had 25 minutes left on the timer), they were completely pulverized!!!! Into a soup almost! After I stood there with my jaw on the floor for a moment, I had two thoughts: #1–this would be a REALLY easy way to make lentil soup for this kids! #2–This looks a bit like curry….

IMG_4495

Which is how my dinner was born 🙂

I decided to make this into a version of an Indian dish. Now, I have kids that won’t eat ONE FLAKE of black pepper because it’s “too spicy.” So I use spicy things extremely minimally. That doesn’t mean your food can’t have lots of flavor! I added some cumin to this, a bit of garlic salt, and a TINY bit of turmeric (don’t tell the kiddos!). Then after tasting it, instead of making the veggies the star of the dish, I knew I had to make this creation the star of the dish.

I let the veggies get nice and done in the crock pot…love the smell of a crock pot filling up a house! So I ended up serving this dish layered like this: rice on the bottom, my new “curry lentils” over the rice, and veggies on top. IT WAS A HUGE HIT! I was asked by all my duckies (including papa duck) to put this baby in the rotation. So, I have! 🙂

Happy eating, friends!

Part One: root veggies in the crock pot

Chop your root veggies…the beauty here is that you can use any veggies you want! In this recipe, I used carrots, parsnips, potatoes, purple potatoes, sweet potatoes, mushrooms,  onions, garlic, and added some pepper and a pinch of garlic salt. Throw everything in the crock pot. Add some vegetable broth. Enough to help make the veggies soft, but not so much that you end up with a stew instead of perfectly cooked veggies. The broth should cover the bottom of the crock pot about one to two inches. Set the crock pot for high 4 hours or low 6 hours. You will want to check it a few times to be sure veggies are getting tender but not pulverized. (Photo is after cooking!)

IMG_4496

Part Two: curry lentils and rice

Use red lentils. Rinse and drain them (do not soak). Follow directions on package for water-to-lentil ratio. Bring your water to a boil. Add red lentils and set timer for 20 minutes. After 20 minutes, lentils should have formed a thick, pulverized stew-like consistency. Add cumin, turmeric, and garlic salt to taste.

Prepare a rice of your choice following directions on the package.

Part Three: plating 🙂

First plate the rice. Then ladle some of the yummy lentils on top of the rice to get it all juicy. Add veggies on top and serve hot. If you want it to look fancy, add a fresh sprig of parsley on top of the veggies. YUM!

IMG_4498

Memorial Day Treat

Happy Memorial Day to all! We did a short road trip (and by short I mean it’s supposed to be relatively short but with two toddlers and a 7-month-old it was very long and miserable being in the car that long) to Pennsylvania for Memorial Day weekend. But we kicked off the weekend at home, Friday, and I made a beautiful, yummy treat for the kids.

It has been SUPER hot here the last few days so it felt like the perfect time to bust out my popsicle molds and make some low-sugar, refreshing, healthy, yummy ice pops for the kids (ok…for me and the hubs, too! 😉 ). I really love making these because the kids think they are pulling one over on us by getting their way with an ice pop and I think I’m pulling one over on them by feeding them basically a frozen healthy smoothie 🙂

There are SO many ways you can make ice pops. Some people just pour juice into the molds but for me, that is far too much sugar. If you’ve been reading my blogs, you all know by now that we have been trying to reduce our sugar intake and that even one glass of juice will put your kids over their daily recommended sugar allowance (according to the WHO). So, instead of using juice, I use fresh fruit, a little bit of water, and my special ingredient–creme fraiche! SO EASY. And beautiful. And hits the spot on a 90 degree day!

Here’s my recipe and some photos to go along with it…

The first batch I made was orange/strawberry. Obviously, wash the strawberries and cut off the green tops. Then I quartered mine. I like to have chunks–albeit, small chunks–of fruit in the finished popsicle. Peel and separate your orange in slices. I recommend peeling all the membranes off the individual orange slices so you don’t have to “chew” your popsicle when it comes out. 😉 Below you’ll see my ingredients ready to go into the blender.

If you’ve been reading my blogs you’ll also know that I don’t measure but I eyeball things. So…this is how much fruit I thought I needed for about 10 ounces of liquid. I added probably about 2 tablespoons of creme fraiche and then a little water (maybe 2 ounces? You can play with it–you won’t do it wrong and you will have lots of fruit flavor unless you put waaaaay too much water in!).

After blending, this is what I had…and I poured it into the popsicle molds 🙂

I actually left mine in the freezer overnight because the kids didn’t know about them (I made them thursday and we ate them Friday) but these should freeze in a couple of hours or so.  My second batch was strawberry/blueberry/banana. The first photo is the orange/strawberry and the second photo is the strawberry/blueberry/banana.

I cannot even tell you how much of a hit both of these were. Especially the second batch–my kids LOVE bananas. You can use any type of fruit that you think will go great with the creme fraiche. Another way to do it is to use plain yogurt instead of the creme fraiche–don’t use yogurt with added sugar, though!!!! Be creative…my next batch will be peaches and cream 😉 Whatever you choose, enjoy! And a massive thank you to all the service men and women out there who have dedicated and given their lives for our freedoms ❤

Short and Sweet…

So all this talk about reducing sugar and eating super foods and having a healthy lifestyle…it doesn’t mean you can’t indulge once in a while. The key word here is balance. One thing I love to make to satisfy my family’s sweet tooth is homemade whipped cream. It is super indulgent, I can control the amount of sugar I’m adding, and it goes perfectly with all kinds of fruits and berries (and as I’m sure you know, many berries are super foods!).

I like to add real vanilla bean paste to my homemade whipped cream to make it extra decadent. I do use white, refined sugar, but just a bit. We’re used to less sugar so a little bit goes a long way. That is one thing I’ve noticed with reducing or detoxing sugar–after your body adjusts, a tiny bit of sweetness goes a LONG way. Which is great! Because you can still indulge once in a while and not go overboard doing it.

We eat dairy in this house so if you are vegan, you’ll have to skip this one (sorry!). Maybe one day I will try one of these recipes for vegan whipped coconut cream, but for today I’m sharing my dairy whipped cream!

About those berries…ever hear of the ORAC (Oxygen Radical Absorbance Capacity) scale? It’s a lab test that quantifies the capacity of antioxidants in a food. Why should you care? Because the better a food protects its “good stuff”, the more of that said “good stuff” your body will be able to absorb! Learn more here. I added blueberries (ORAC: 4,669), black berries (ORAC: 19,220), strawberries, and the next night, peaches to our whipped cream 🙂 What will you add? Pomegranate seeds, red raspberries, goji berries (ORAC: 3,290), oranges, bananas, some cinnamon (ORAC: 131,420) on top, some nuts for a little added protein? Endless possibilities, people! Which is why you can make this one a regular in your menu plans and just rotate the toppings 🙂 Kiddos love it! Want to know all the ORAC values of the above listed toppings? You can find that info here. Without further ado…

Homemade Whipped Cream

1 Pint Heavy Whipping Cream

Vanilla Bean Paste (one bean)

1-2 Tablespoons white sugar to taste

Berries, peaches, other fruits, nuts, coffee, black tea, whatever else you’d like to eat this with! 🙂

This makes a lot of whipped cream so you might want to half it if your family is less than four people 😉

You’ll need a whisk head like this for your mixer:

IMG_4632

If you’ve never worked with vanilla beans, you will want to cut the bean in half, then you slice the bean down the middle. Open it up so you can see the paste in the middle. And then scrape the paste out of the bean. You will add this directly to the bowl just like this. So, leave it on your knife and set it aside.

Ok…now…

Add the whipping cream, vanilla bean paste, and sugar to your mixing bowl. Mix on high (with your whisk head) until the cream starts to look fluffy and forms peaks. Scrape the sides of the bowl and put the cream in the fridge to set (about 20 minutes or so). Add your other goodies and enjoy! Keep the whipped cream in the fridge. For best storage, I like to keep it right in my stainless steel mixing bowl so it stays nice and evenly chilled!

Don’t worry, be hempy :)

Ok…so I can’t take credit for the title. It’s actually the name of the hemp butter I used to make the above sandwich.

That’s right, hemp butter. Who knew!? The Peanut Principle is an awesome peanut butter company that has REALLY revolutionized the concept of nut and seed butters. We are lucky enough to have these guys at our local farmer’s market and we stop at their stand often. It seems like they are always coming up with new ideas and they have so many products! Last weekend at the market, I stumbled upon their hemp butter, Don’t Worry, Be Hempy.

Eyebrows were raised. Labels were read. It was a very timely stumbling (have I mentioned yet that I don’t believe in coincidence?) because I had just been reading about the history and the amazing health benefits of hemp. Of course I picked up a jar 😉

So let’s talk about hemp. You probably conjure up all kinds of images when you hear that word. Hippie jewelry, perhaps? Hippie shampoo? Hippie clothes? Maybe even “weed”? Um…hippies in general?? First things first…is hemp cannabis? Yes. Is hemp marijuana? No. They are both varieties of cannabis but are chemically and structurally different. Hemp is used for its fiber and the other variety for its narcotic effects. THC–the chemical in marijuana that makes people high–is found in trace amounts in hemp. Obviously, it’s found in higher amounts in weed (10%-27%, typically).

I was watching a documentary (I’m a documentary junkie!) about cannabis and learned a lot about the history of hemp and weed. Unfortunately, I can’t think of the name of it and when I did a search to try to find it, so many came up that I have no idea which one it was. But here is what I was surprised to learn: Did you know growing hemp (not marijuana–hemp) is illegal in the US? Like right now? And has been for decades? When the early settlers arrived in the US, hemp was used to make everything from wagon covers, canvases, clothes, rope, jewelry, baskets…you name it. In fact, early on in the Jamestown settlement, land owners were required to grow hemp for export to England. According to this site, hemp was even considered currency…like people paid their taxes with it. What?! In today’s world, hemp is still an amazingly profitable crop…but not for US farmers 😦 Anyone in the US using hemp to make products is importing it from other countries. Ridiculous? Yes, very much so. You can find some great facts about the history of hemp and the movement to legalize it for farmers here in the US on this site.

Ok. Back to the point of this particular post…hemp is also a super food! Well, the seeds are a super food 🙂 And the rest of the plant is pretty amazing as well, as we’ve learned. Even the “recreational” variety of cannabis is pretty darn amazing. Curing cancer? Treating asthma? Stopping epilepsy? Yes. All of the above. But that is for another blog post! Back to our super food of the hour…

Hemp seeds have a perfect balance of omega 3 to omega 6 fats. They also contain protein, iron, vitamin E, fiber, magnesium, and all but one of the essential amino acids. In our house, we eat hemp butter and hemp powder. You can also get hemp oil, hemp seeds, hemp cakes, hemp protein…I’m sure the list is growing as we speak! I enjoyed referencing this article for a lot of the nutritional information listed in my post. At any rate, the sandwich was yummy–and pretty! 🙂

So what are you waiting for?? Go get your hemp on!

IMG_4392

PBHB Sandwich (Peanut Butter, Hemp and Banana)

Peanut Butter

Hemp Butter

Bananas

Healthy bread of choice

It’s not rocket science…slap those babies together and make a sandwich! 😉

You can find some additional interesting facts about hemp here.

Something yummy for your tummy.

I’m going to start off with a neat little recipe I threw together the other day. Lately I’ve been on this kick…less sugar, less meat, and more super foods. Ok, truth be told, I tried to cut sugar out cold turkey on the same day I went meatless and my insides didn’t like me very much >:0

So, now the goal is a little more reasonable: less sugar, less meat, more super foods (it’s like a mantra, right?). Do you know what your daily recommended sugar intake is as an adult? I bet you don’t 😉 If you are female, it’s 25 grams (6 teaspoons). If you are male, it’s 37.5 grams (9 teaspoons). It’s trickier for kids. Preschoolers get 4 teaspoons if their caloric intake is 1,200 to 1,400 and if their intake is 1,600, then their limit is 3 teaspoons. Pre-teens and teens have an allowance of 5-8 teaspoons assuming they consume between 1,800-2,00 calories a day. Whew!

That is a lot of info…but I digress. Because this is not a post about sugar. It is a post about my yummy recipe 🙂 So here is my warm parsnip salad for you to enjoy. Parsnips are one of my favorite root vegetables. Highly overlooked in my humble opinion. The super food here is the broccoli sprouts. More to come on those…And stay tuned for a post that delves into the white powdery stuff.

My apologies, for I am one of those folks who doesn’t measure things when I’m “winging it” with recipes!

IMG_3930Warm parsnip salad

Parsnips

Fresh Ginger Root
Broccoli Sprouts
Fresh Mozerella Cheese
Balsamic Vinegar
Olive Oil
Black Pepper

Preheat oven to 325. Peel your parsnips and cut them into chunks. Peel and slice your fresh ginger. Drizzle a tablespoon or so (depending on how many parsnips you have) into a 9×13 baking dish. Add parsnips and ginger. Sprinkle with pepper. Toss to coat with the oil. Cover with foil and bake approx 40 minutes (or until tender).

While they are baking, get your sprouts out and wash them. Chop your fresh mozerella into bite-size pieces. Here is how I make my dressing: in a shot glass (yes, you heard me), I fill it about 1/3 full of olive oil and then I add my balsamic to taste. Some days I want a little more of the sweet, tangy stuff and other days I’m in more of a subtle mood.

When the parsnips come out, let them cool but only slightly. The idea is to add your sprouts and cheese while the parsnips are still warm so the cheese gets a little softer (but not melted!) and the dressing warms up when you drizzle it on top. I also added more fresh pepper on top.

Viola! Simple. Easy. Healthy. Low in sugar. And your tummy will be full 🙂 See you next time.